Last updated: 12 June 2026
Skincare progress photos — a simple protocol
Tretinoin takes three to six months to start showing. Minoxidil takes four. A beard fills in over a year. A retinol routine doesn't tell you anything before week eight.
These are journeys where the change is slow enough that you stop being able to tell whether it's working.
Bad photos will convince you either that nothing's happening or that everything's getting worse.
A practical note from my own experience: weekly 'before' photos taken in mixed light convinced me to quit routines until I started overlaying previous shots.
If you want to see what's happening, the protocol must outlast a year of changing weather, moods and motivation.
I started building Contour because I got tired of weekly 'before' photos taken under bathroom light that convinced me a routine had failed.
This is general guidance, not medical advice. Talk to a dermatologist about your specific routine.
Why most progress photos are useless
Three things drift between shots, and any one of them is enough to make the comparison meaningless:
- Light direction. Overhead light flattens skin and exaggerates pores and bumps. Side light from a window sculpts and shadows. Front light from a phone screen washes everything out. A tretinoin "purge" under overhead bathroom light looks like a disaster; the same skin in even daylight looks fine.
- Distance and angle. Closer to the camera = bigger pores, bigger bumps. Further away = smoother skin. A 30cm vs 60cm difference between months will fake skin texture in either direction.
- Time and skin state. Morning skin (un-creased, slightly oily) and evening skin (creased, dry, post-cleanser) are visually different. Pick one window and stick to it.
The skincare progress photo protocol
One setup, used for any slow skin journey — tretinoin, retinol, accutane, minoxidil, beard growth, mustache, scar healing, acne treatment.
See the practical checklist in the how to take progress photos.
- Daylight, indirect and consistent. Prefer north-facing windows or windows with a sheer curtain; photograph mid-morning to early afternoon for stable light. If light varies by season, photograph at the same clock time and record the time you took the shot.
- Phone at one distance. Mark a chair or tape a spot on the floor; measure the distance from the mark to the camera lens and note it (for example 55 cm). Use the phone's grid and set exposure to auto-lock (tap-and-hold on iPhone) to keep brightness consistent.
- Three angles. Straight on, left 45°, right 45°. Same three every time. The 45° angles show texture and changes that the straight-on shot hides.
- Bare face, dry, same time of day. No make-up, no fresh product on the skin. Either morning before applying anything, or evening after cleanser and a fixed wait time. Pick one and don't switch.
- Same expression. Neutral. No smile, no scrunch. Don't smile in some photos and frown in others — facial expressions hide and reveal lines.
- No filter. Phone camera native. No "beauty mode", no portrait blur, nothing that smooths.
How often to take the photos
For a slow regimen (tretinoin, minoxidil, accutane, beard): weekly is plenty. Monthly is fine. Daily gives you noise — your skin looks worse on Monday after a stressful weekend than it does on Thursday after a few nights of good sleep, and that has nothing to do with the routine.
For a sharper regimen (a 28-day exfoliating program, a 6-week peel cycle): twice a week, on the same two days.
The framing trick that locks in the comparison
Three angles, three months of weekly photos, that's 36 shots per angle. Holding them perfectly aligned by hand typically fails by week five. The straight-on shot drifts up. The 45° shifts to 40°. The distance changes by 10cm. By month 3 your "purge vs cleared" comparison is muddy because the framing is different.
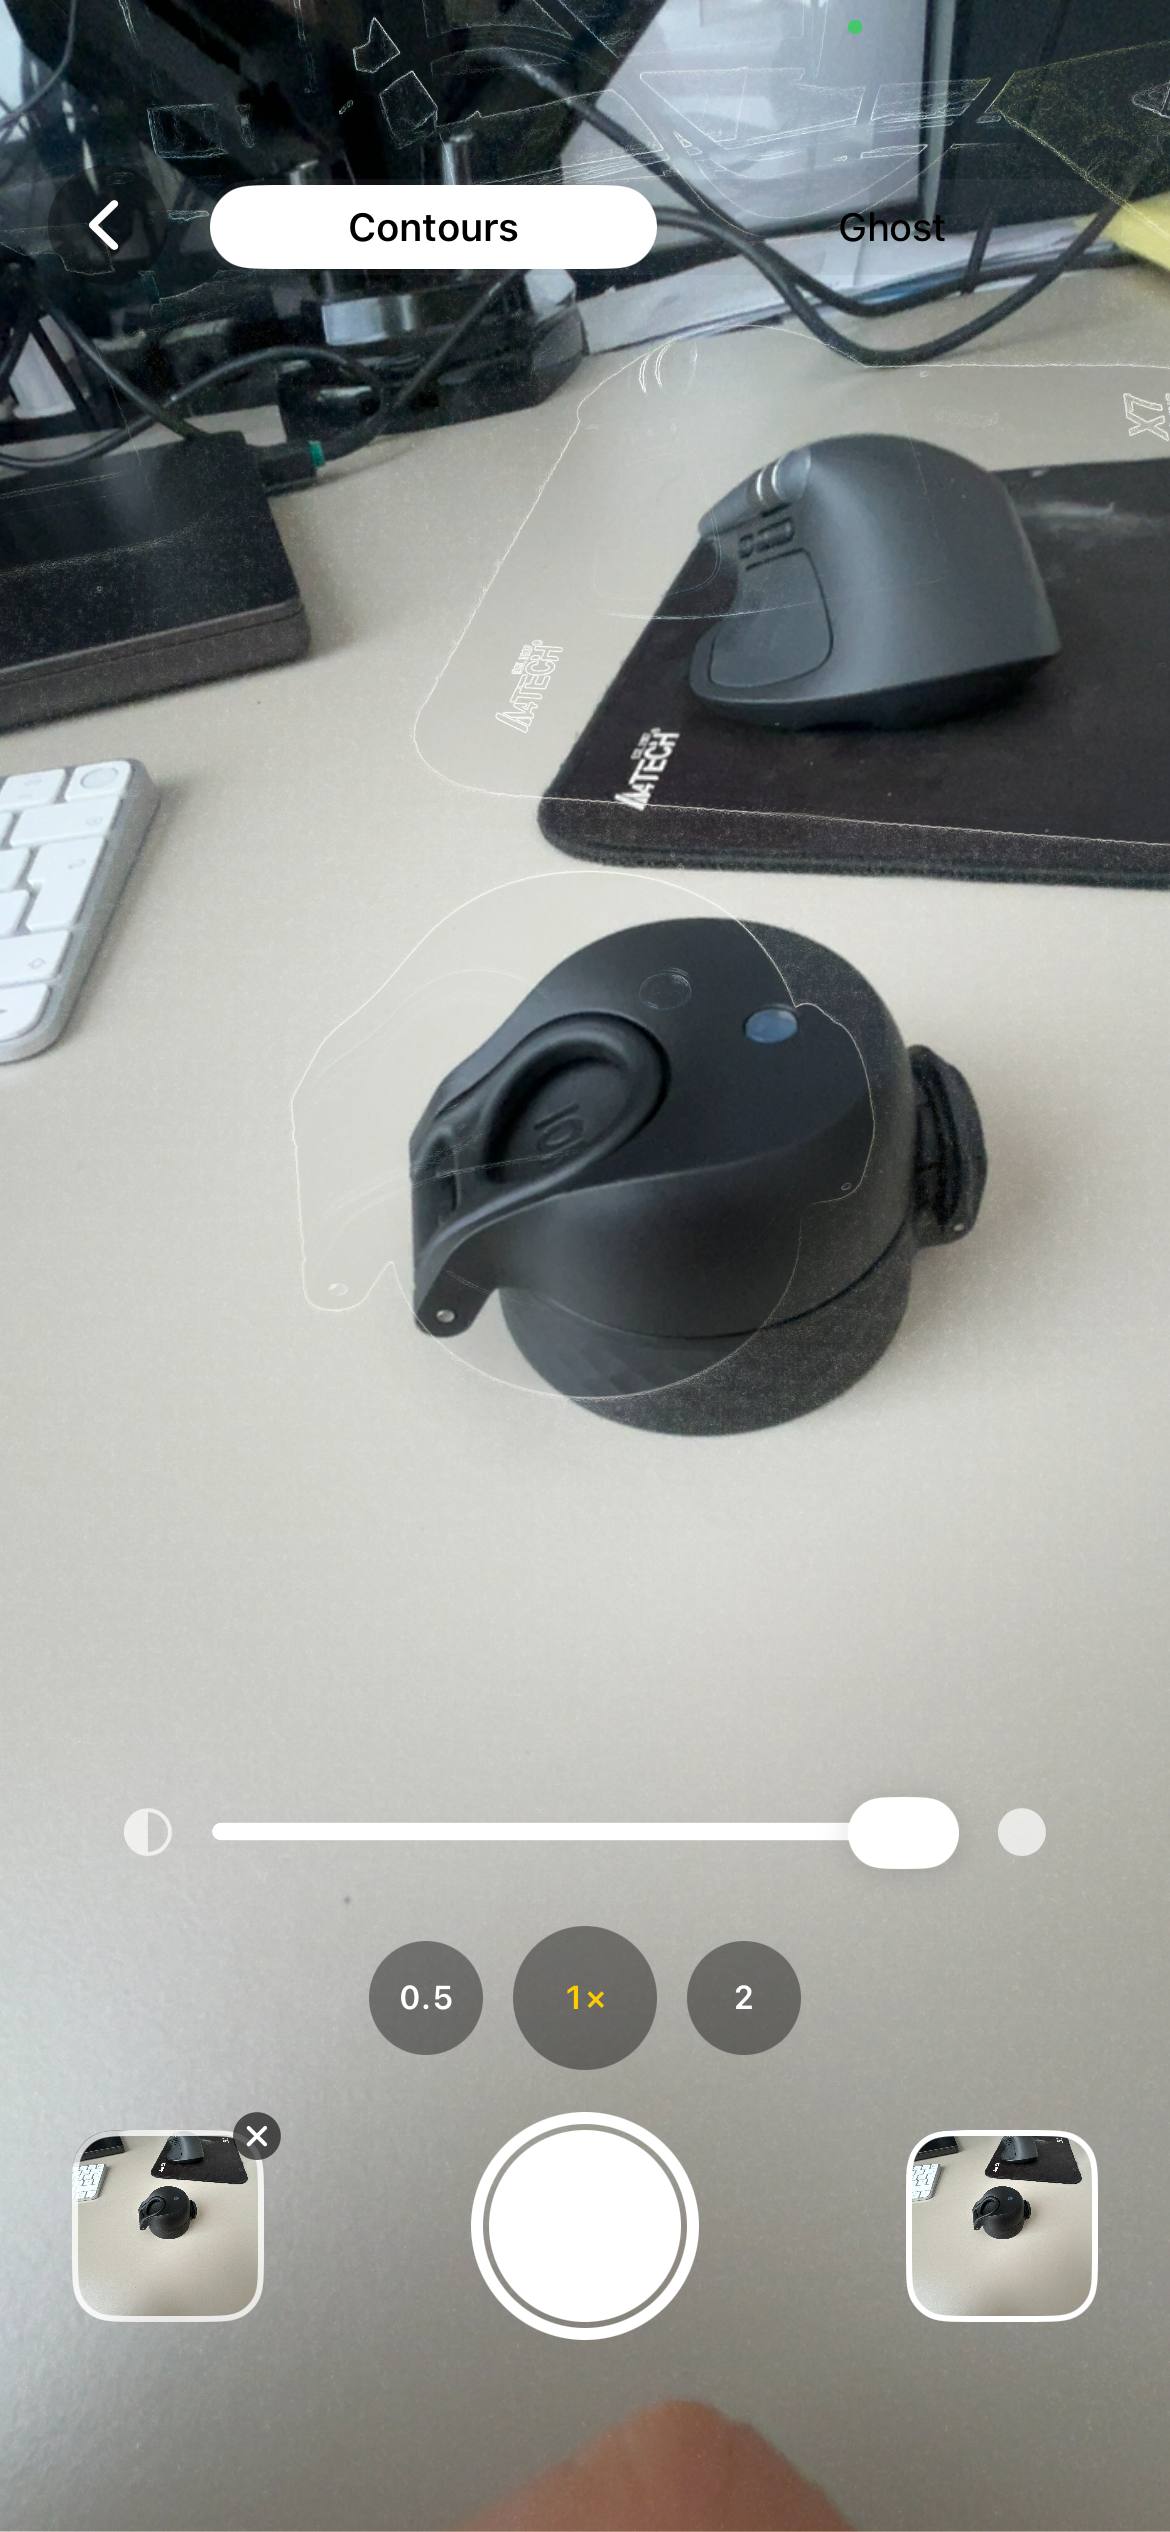
The fix is to see last week's photo while you take this week's. I built Contour for this. A practical mistake I made early on was trusting the phone grid instead of marking the stool. I now tape a point on the floor and a sticky note on the wall — tiny, consistent markers save months of drift.
Load the previous week's straight-on shot, the app traces the outlines of your face, the camera shows them overlaid on your live view. Move the phone, your head, until the outlines snap onto today's face. Move deliberately for each angle. Take the shot. Repeat for the two 45° angles. For more on recreating framing precisely, read rephotography tips.
Once you have the series, slide between any two photos to compare — week 0 vs week 12, or week 6 (purge) vs week 16 (cleared) — or stitch the whole thing into a GIF.
Sub-routines that need their own attention
How do I photograph a tretinoin journey?
Take weekly photos. Expect a purge in weeks 2–6; keep a week‑0 baseline and compare month 4 vs month 0 to see smoothing. Use identical lighting and camera position so the purge isn't exaggerated by overhead lamps.
Accutane / Isotretinoin
Slow, six-month course. Take monthly photos. The dry-lips and peeling phases will dominate the early shots — the smoother final skin only shows up around month 4–5. Keep going.
Minoxidil
Hair counts and density at month 0, month 3, month 6. Top of head with overhead light is the diagnostic angle. The first three months can feature an early shed — the same shedding-then-regrowing pattern as a transplant; for framing and top-of-head shots see the hair transplant guide: Hair transplant progress photos. Don't quit before month 4.
Beard and mustache growth
Weekly side-profile photos. A beard fills in unevenly — the cheeks and the lower lip patches are usually last. Compare months 2 and 4 side-by-side to see whether trimming is buying you a more even look or whether the patches are filling in on their own. For framing and close-up beard shots see the hair transplant guide: Hair transplant progress photos.
Acne treatment
Photograph forehead, both cheeks, chin, and jawline as separate close-ups in the same light. Whole-face shots hide the per-zone story. The chin clears before the cheeks in most adult hormonal acne.
Mistakes that fake the result in either direction
- Overhead bathroom light in the "before". Makes the starting point look much worse than it is, then "after" in window light looks miraculous. Honest comparison is impossible.
- Different camera angle in before vs after. Up-angle hides pores, down-angle shows them. Same applies in reverse.
- Different distances. A "before" at arm's length and an "after" further away will fake smoother skin even if nothing has changed.
- Filters or beauty mode "just for the selfie". Even mild smoothing destroys the comparison. Native camera, no enhancement, always.
- One photo a month with no setup. Random angles, random light, random expressions, random hair. The comparison shows nothing real.
FAQ
Common questions are below and in the structured FAQ. For more, see the FAQ at the top of the page or try the app.
See the change, not the lighting
Contour overlays your previous photo on the live camera so you line up framing exactly and avoid lighting noise. iPhone app, free to use, photos stay on your device.
Download Contour (opens App Store; available in your region)