Last updated: 12 June 2026
Hair transplant progress: month-by-month
A hair transplant doesn't show up overnight. The real result takes 12 to 18 months.
The path isn't a smooth ramp — it dips. It can look worse than the starting point for a while, then improve. If you don't know that going in, month 3 will convince you the surgery failed.
This article walks through what to expect at each stage and how to photograph your own progress in a way that's honest — same lighting, same angle, same crop — so you can actually see what's happening instead of being misled by your bathroom light. I started Contour after the bathroom-light mistake on my own rephotography set — I had inconsistent shots and couldn't prove progress, which is why I built an overlay workflow.
This is general information, not medical advice. Follow your surgeon's instructions over anything you read online.
Month 0 — the day of and the first week
The transplanted area is swollen, red and crusted. Tiny scabs form around each graft. The donor area (usually back and sides) has a thin line if FUT, or a peppered pattern of small dots if FUE. Sleep upright. Don't touch. Don't pick the scabs — they hold the grafts in place.
Take the baseline photos here. Top of head, front, sides, hairline. Same five angles, every time, forever. These are your true "before" reference.
Month 1 — the shedding phase
This is the part nobody warns you about loudly enough. Around weeks 2 to 4, the transplanted hairs shed. They fall out. Your head looks like the transplant didn't take. Some people lose more density in the recipient area than they had before the surgery.
Many patients shed the majority of visible transplanted hairs in the first month — often a large percentage — but the exact amount varies by person and technique; this is expected and not a failure.
If you didn't take the day-0 photos, you'll panic. If you did, the comparison shows: the surgery did happen, the grafts did go in, and this is the dip everyone goes through.
Month 3 — the ugly duckling stage
Months 2 to 4 are the worst it looks. The shed is complete, the new growth hasn't started yet, and the scalp can look thinner than before. Some people get acne-like bumps where new hairs are pushing through. The recipient area can look pink or slightly mottled.
If you'd only seen month 3 photos, you'd think the procedure didn't work. This is why clinics show you "month 0 vs month 12" — month 3 isn't a marketable picture.
Month 4 to 6 — early growth
Around month 4, the first new hairs start poking through. They're thin and wispy at first.
By month 6, roughly half of the transplanted hair has returned. These hairs are short and still maturing. The new hairline shape becomes visible, but density remains below the final result.
This is when honest progress photos start paying off. Side by side with the day-0 shot, you can see real change — but only if the framing is consistent. See the rephotography guide.
Month 9 — visible density
The hairs that grew in at months 4–6 are now longer, thicker, and getting their proper colour. You can comb the area. The hairline looks like a hairline. People around you start to notice, even if they don't know what they're noticing.
Around 70–80% of the final result is in by month 9. The rest is the late bloomers and the thickening of what's already there.
Month 12 — the "result" shot
This is the photo clinics use. The recipient area has filled in. The hairs have reached normal terminal thickness. The result is mature enough that most people consider it "done".
Continue to month 18 for a true final picture — some follicles wake up late, and density can keep improving subtly for another six months. A small minority of grafts come in after month 12.
Month 18 — the real final
The hair you'll have for years. Compare your day-0 photos to month 18 photos. If you took them consistently, the difference is unmistakable. If you didn't — if some shots are bathroom light and some are window light, some are looking down and some are looking up — you've got a great surgery and an ambiguous record.
How to photograph hair transplant progress honestly
Lighting and angle can fake either better or worse results. Bright overhead light onto a thin hairline shows scalp through every gap. Side-window light into a similarly-thin hairline can flatter it heavily. If you flip between those two between month 0 and month 12, you can either inflate or hide your actual result.
To get an honest record, set this once and never change it:
Practical checklist for clinics and patients:
- Device: use the same phone model if possible; iPhone HEIC/JPEG is fine. Turn off portrait or beauty modes. Use the main rear camera for top/head shots.
- Orientation & distance: portrait orientation for front and side shots, landscape only for top-of-head if you prefer; mark the floor or wall so camera distance is repeatable (e.g. 1.2 m from subject).
- Height: note camera height (cm from floor) and mark with tape or photograph the phone on a tripod so you can reproduce it.
- Lighting: soft daylight from a side window, indirect; avoid overhead bathroom lights. Record 'room name + time' (eg. 'bathroom, 09:30') in a text file so you repeat it.
- Hair state: dry, combed, no products. Record 'dry/combed' in file name.
- File naming: YYYYMMDD_angle (eg. 20260612_top.jpg). Keep originals unchanged; export copies for messages.
These specifics give clinics consistent records they can act on.
The overlay trick that locks in the framing
I built Contour for this after a year of drifting frames on my own progress shots. Load last month's photo and the app overlays outlines on the live camera so you line up head shape and hairline before you press the shutter.
You can do the first four rules and still have the photos drift over a year. The fix is to compare to the previous photo while you're taking the new one, not after.
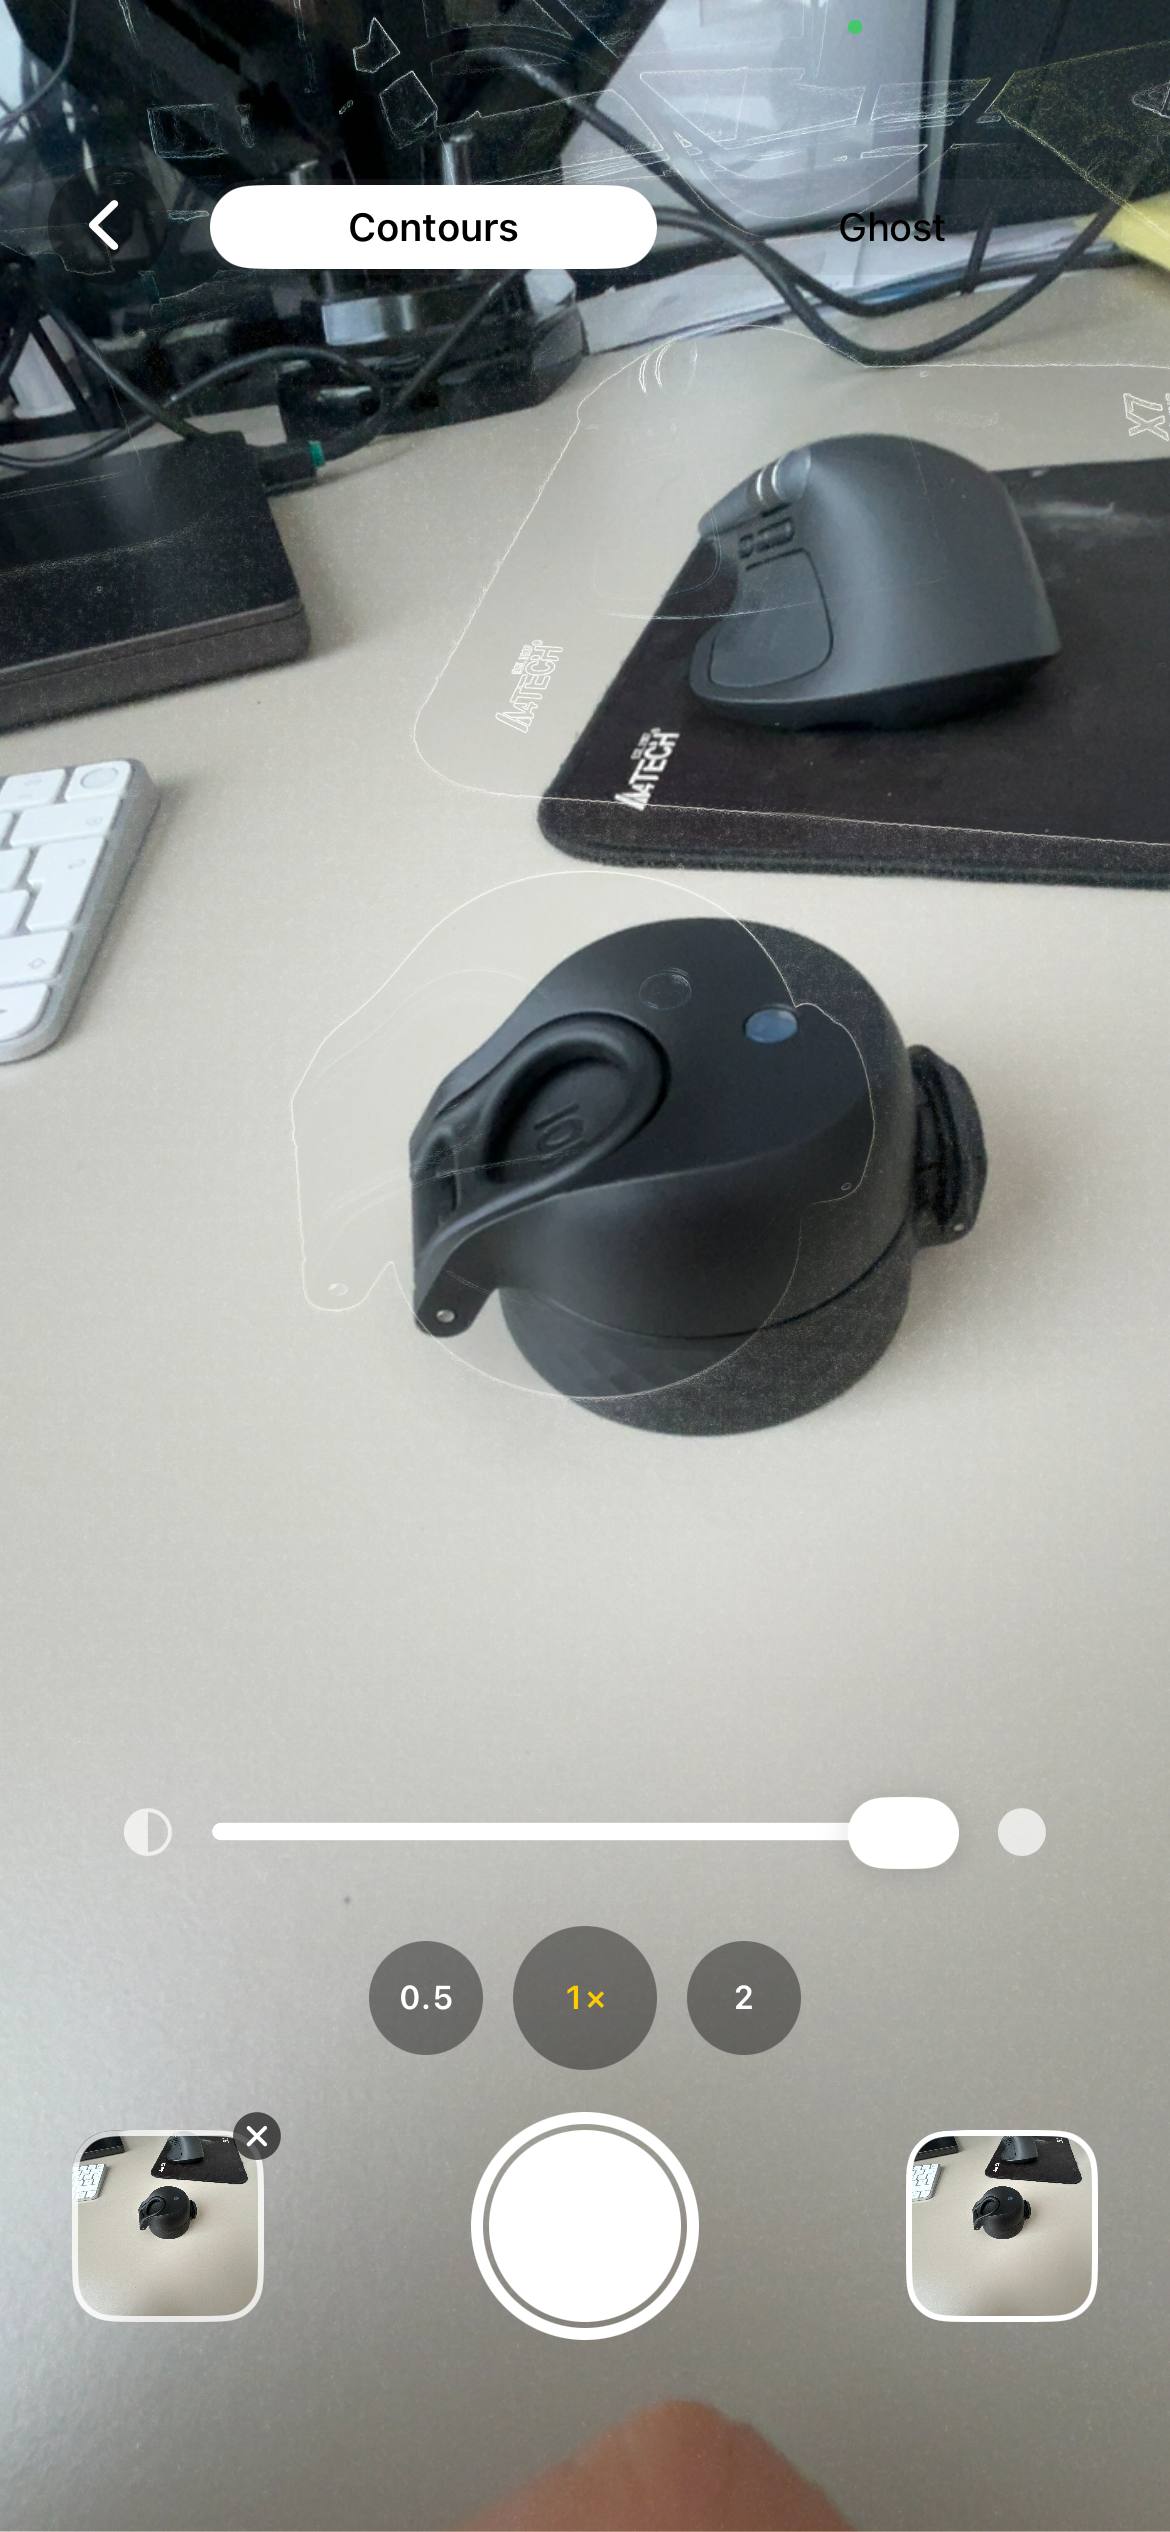
Load last month's photo. The app traces the outlines — your head shape, your hairline, the edges of your face — and overlays them on the live camera.
You move your head, the camera, or both, until the outlines snap onto today's reflection. Press the shutter. The new photo has the same framing as last month's.
Over 18 months, that's 18 photos in the same frame, ready to slide between as a before/after or stitch into a GIF that actually shows the change.
What to send your clinic
If your clinic asks for follow-up photos at month 6, 9 and 12, send them the how to take progress photos set. Consistent framing makes their assessment more useful — they can spot patchy growth or graft retention issues that random angles would hide. It also makes your case stronger if you ever need a touch-up included under their guarantee. See the clinic photo checklist in the how to take progress photos guide and a step-by-step rephotography method in the rephotography guide.
FAQ
When do hair transplants start to look good?
Around month 6–9 you can see visible improvement; month 12 is typically a mature result and month 18 is the final refinement.
Early growth at months 4–6 is thin and wispy; density and thickness develop through month 12, with subtle late gains by month 18.
Why does my hair look worse 1 month after the transplant?
It's the shed phase: transplanted hairs fall out while follicles rest, and new hair appears later.
The hair shaft sheds at week 2–4 but the follicle remains; new growth typically starts months later as follicles exit the resting phase.
Should I take photos every week?
Monthly is sufficient; weekly photos show little change and can be discouraging.
Monthly images in the same setup reveal the true trend without the noise of day-to-day variation.
What's the best app for documenting hair transplant progress?
Contour overlays your previous shot on the live camera so you can align head shape and hairline each month.
It is a free iPhone app and nothing is uploaded. Download on the App Store →
Can lighting make a hair transplant look better or worse than it is?
Yes — lighting changes perceived density dramatically; pick one consistent setup and repeat it each time.
Overhead bathroom lights exaggerate thinning; soft side daylight gives a fairer view of density.
How long do transplanted hairs take to fully thicken?
They thicken over months; most reach terminal thickness by month 12 and essentially all by month 18.
New hairs start thin and gradually gain pigment and diameter through the first year, with final refinements around month 18.
What should a hair transplant month-by-month progress photo set include?
Five consistent angles: top, front, left, right and hairline close-up, all with the same lighting and camera setup.
Use dated file names and keep originals so the clinic can build a clear month-by-month timeline.
How often should I send hair transplant monthly progress photos to my clinic?
Send photos at month 1 (baseline), month 3, month 6, month 9 and month 12.
Include monthly photos if your clinic requests them or if growth looks patchy; more frequent images rarely help clinical decisions.
Consistent photos, honest records
Use Contour to overlay your previous shot while you take the next one so head shape and hairline line up every month. Works on iPhone; free to download and nothing is uploaded.
Download Contour