Last updated: 12 June 2026
Tattoo healing stages — day-by-day
A new tattoo heals over four to six weeks. The surface skin usually closes in about two weeks, but the deeper layers — where the ink sits — take longer to settle.
Knowing what each stage looks like helps you avoid unnecessary worry during aftercare. Below is a day‑by‑day timeline and simple checks to tell normal healing from trouble.
If you want a reliable healing record for yourself or to send your artist, start by fixing your place, light and angle. For framing and lighting tips, see the progress photos guide.
Stage 1 — Days 1 to 3: oozing and weeping
Fresh out of the chair, your tattoo is an open wound. The skin is swollen, red around the edges, and warm. For the first 24 to 48 hours it weeps a mix of plasma, blood and excess ink. This is called "tattoo bleed" or "ink weep" and it's completely normal — the body's pushing out what it doesn't need.
What's normal: redness, mild swelling, weeping, slight bruising on softer skin (ribs, inner arm, ankle).
What to watch for: redness spreading well beyond the tattoo, hot to the touch, pus that's yellow or green, fever. That's infection — see a doctor, not a forum.
Care: follow your artist's wrap instructions. Whether they used cling film, Saniderm or nothing at all, do what they said. Wash gently with a fragrance-free soap under lukewarm water for 30–60 seconds, twice daily — pat dry with a clean towel. Use a light water-based lotion or a thin layer of ointment only as advised by your artist.
Stage 2 — Days 3 to 6: tightness and the start of scabbing
The weeping stops. The skin tightens and starts to feel stiff, especially over joints or where the tattoo wraps around. Thin scabs begin to form — they should look like a slightly raised, dry version of the design, not chunky black crusts.
What's normal: tightness, mild discomfort, thin even scabbing, the design starts to look a little duller as the scab forms on top.
What to watch for: thick, raised, chunky scabs (often means the artist worked the skin too hard, or you've been over-moisturising and trapping moisture), continuing wetness underneath.
Care: apply a thin layer of light moisturiser, twice a day — a water-based lotion texture is easiest. Too much product suffocates scabs and slows healing.
Stage 3 — Days 6 to 14: the peeling phase
This is the stage that scares people. The scabs and the top layer of skin start to flake off in patches, like a sunburn peel. Underneath, the tattoo looks pale and milky — sometimes called "the milky phase" or "the foggy phase". The design isn't fading. The new skin growing over the ink is just thin and slightly opaque, and it'll clear up.
What's normal: peeling, itching (often intense), the design looking dull, faded or patchy, small bits of coloured flake coming off (yes, that's some surface ink — the deep ink is fine).
What to watch for: picking. Don't. Picking pulls out healing ink and leaves patches. Slap, don't scratch, and let the skin shed on its own.
Care: keep moisturising, but lightly. Loose clothing over the tattoo. No swimming, no baths, no saunas, no direct sun. Showers are fine but quick.
Stage 4 — Days 14 to 30: itching and settling
The visible peeling stops. The tattoo looks closer to its final colour but might still be slightly hazy. The itching can be relentless — your nerves are reconnecting. The skin is closed on top, but the lower layers are still healing and the ink is still locking into place.
What's normal: itching, occasional cloudy patches, the tattoo gradually getting sharper as the new skin clears.
What to watch for: raised, hard ridges (start of a keloid in some people, talk to your artist), persistent redness beyond a few weeks, or patches where the ink has clearly dropped out and gone pale.
Care: continue light moisturising. Sunscreen any time the tattoo is exposed — UV fades fresh ink fast. SPF 30+ minimum, SPF 50 ideally, every time, for the rest of the tattoo's life if you want it to stay sharp. For tips on photographing skin and sun care in photos, see the skincare progress photos resource.
Stage 5 — Weeks 4 to 8: deep healing
The tattoo looks finished. It feels like normal skin. But the dermis underneath — where the ink lives — is still settling for another month or two. This is when colour saturation reaches its final point. Some lines might soften slightly. Some colours might brighten. This is normal.
Touch-ups, if needed, are booked at the 6-to-8-week mark once the artist can see the final healed result. Don't book one earlier — they can't judge what needs fixing while the skin is still settling.
Healing varies by tattoo type
Black and grey
Heals fastest. Less ink trauma, less scabbing, often a clean heal.
Colour
Heals slower. More ink, more skin trauma, thicker scabs, more peeling. Reds and yellows can stay red and slightly raised longer than other colours — they're known irritants.
Fine line
Heals fast on the surface but the lines are vulnerable. Small amounts of ink loss are common — some artists factor a touch-up in from the start.
Hand, finger, foot
Heal worst. The skin regenerates fast and abrades constantly. Expect patchier results and plan on touch-ups.
Rib, sternum, spine
Heal slowly because the skin moves with breathing. Expect more peeling and tightness.
How to actually photograph your healing tattoo
Most healing photos are useless because they're all taken from different angles in different light. Day 3 from one side under warm bathroom light, day 10 from above under cool daylight — you can't compare those. They look like two different tattoos.
If you want a reliable healing record for yourself or to send your artist, start by fixing your place, light and angle. For framing and lighting tips, see the progress photos guide.
- Same spot, same light, same time. Find one place in your home with daylight (not direct sun) and use it every day.
- Same angle. Camera height matters. Use a mirror, a tripod, a friend — but the camera needs to be in the same place each shot.
- Same crop. The tattoo should sit in the same part of the frame in every photo.
- Phone flat to the skin. Not tilted. Tilt distorts the design and faked angles get baked into the comparison.
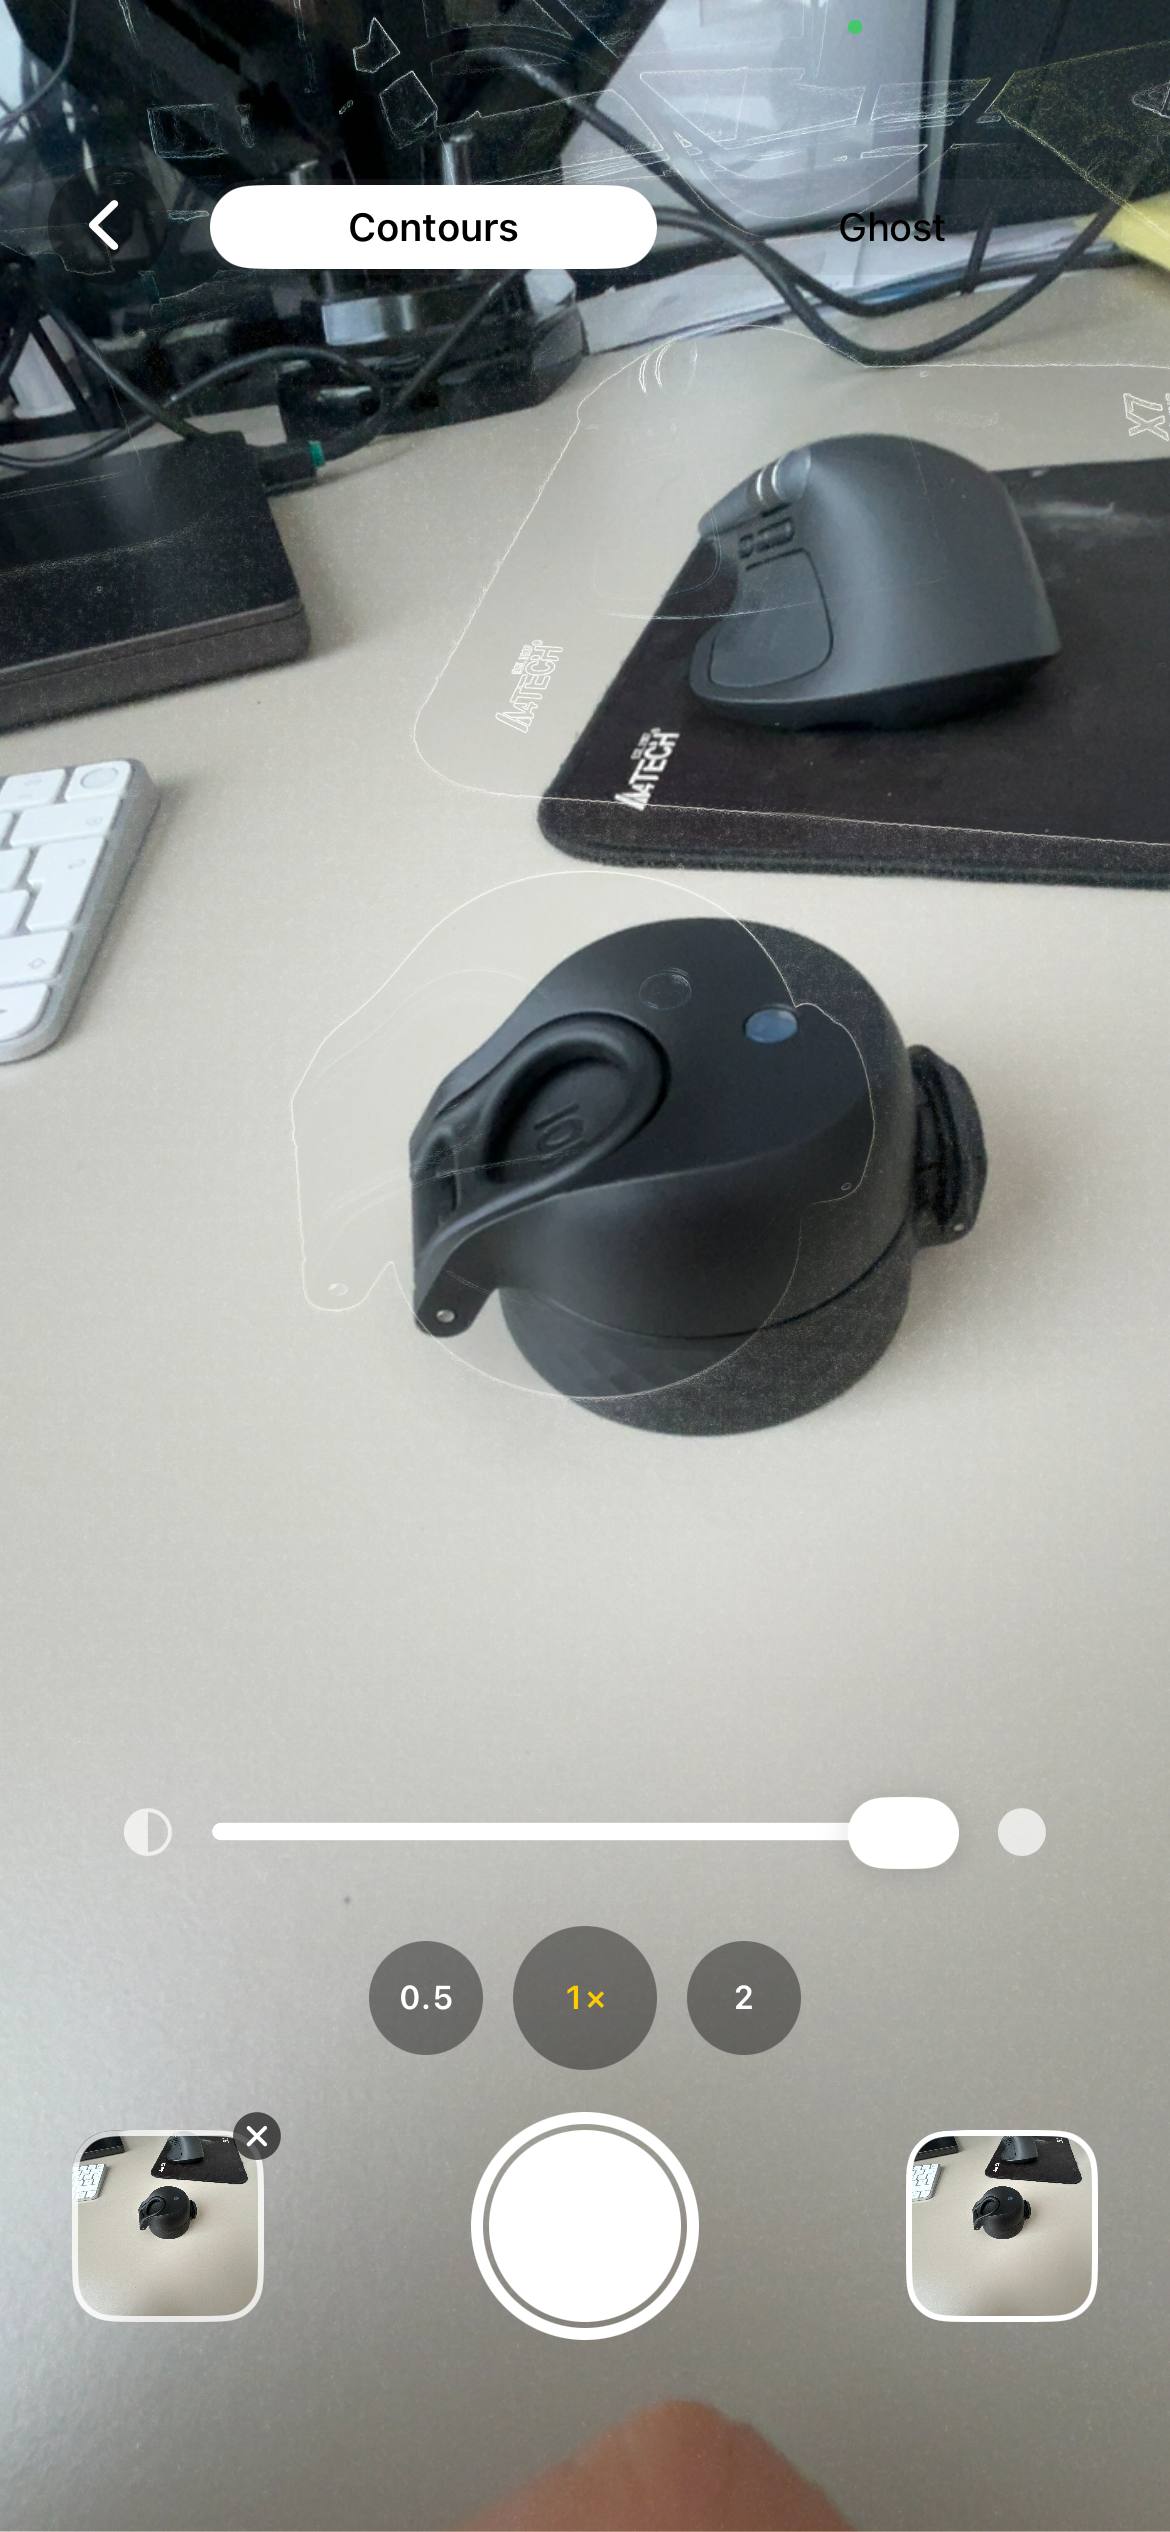
Contour overlays your previous photo on the live camera so daily framing is identical. iPhone app; no photos are uploaded.
The hard one is the angle and crop. Hand-eyeballing it every day means by day 14 you've drifted, and the side-by-side comparison is muddy. For a step-by-step approach to recreating the same photo, see the rephotography guide.
FAQ
What are the tattoo healing stages?
Days 1–3: oozing; Days 3–6: scabbing; Days 6–14: peeling; Days 14–30: itching and settling; Weeks 4–8+: deep healing.
Here’s the longer timeline and what to expect on each day: the first few days are wet and weepy, scabs form around day three, the main peel is week two, then settling continues over weeks.
How long does a tattoo take to fully heal?
Surface skin: 2–3 weeks. Deeper dermis settling: 6–8 weeks.
The surface may look healed far earlier but the dermis needs the full 6–8 weeks to lock ink in place; book touch-ups after that window.
What does a normal healing tattoo look like at one week?
Slightly dull with mid-peel; the design may be partly obscured by flaking skin.
At one week you often see the milky phase where new skin is forming over the ink; this usually clears in the following one to two weeks.
Is it bad if my tattoo isn't peeling?
Not necessarily — some tattoos peel little or not at all; watch for redness or pus.
Peeling varies by ink amount, skin type and placement. Unless there are clear infection signs, a non-peeling tattoo can still be normal.
Why does my tattoo look faded after healing?
Usually a thin layer of new skin makes it look faded; it clears in two to three weeks.
The colour often appears muted until the new epidermis fully thins; if patchiness remains after eight weeks, consult your artist about touch-ups.
How do I photograph my tattoo healing without the photos looking random?
Same spot, light, angle and crop each time; overlaying yesterday's photo helps comparison.
Use the same camera height and distance, consistent daylight and a simple crop. Overlaying previous shots or using a rephotography workflow makes differences obvious.
Can I send healing photos to my artist?
Yes — especially at 4–6 weeks; consistent framing helps artists judge touch-ups.
Most artists appreciate clear, consistently framed progress shots; random angles make it hard to tell if ink loss is real or an optical change.
Make your progress photos comparable
If you want consistent day‑by‑day frames, Contour overlays your previous photo on the live camera so you can match angle, crop and distance. iPhone app; no photos are uploaded.
Open Contour on the App Store